In short
- Day 1 — settings: "About", pickup points, contact channels.
- Day 2 — products: one by one or with an Excel file.
- Day 3 — buyers: access mode, requests and PINs, buyer guides.
- Days 4–6 — the first collection: open, close, hand out.
- Day 7 — "Statistics": who ordered, who hasn't picked up.
Day 1. What should you set up first?
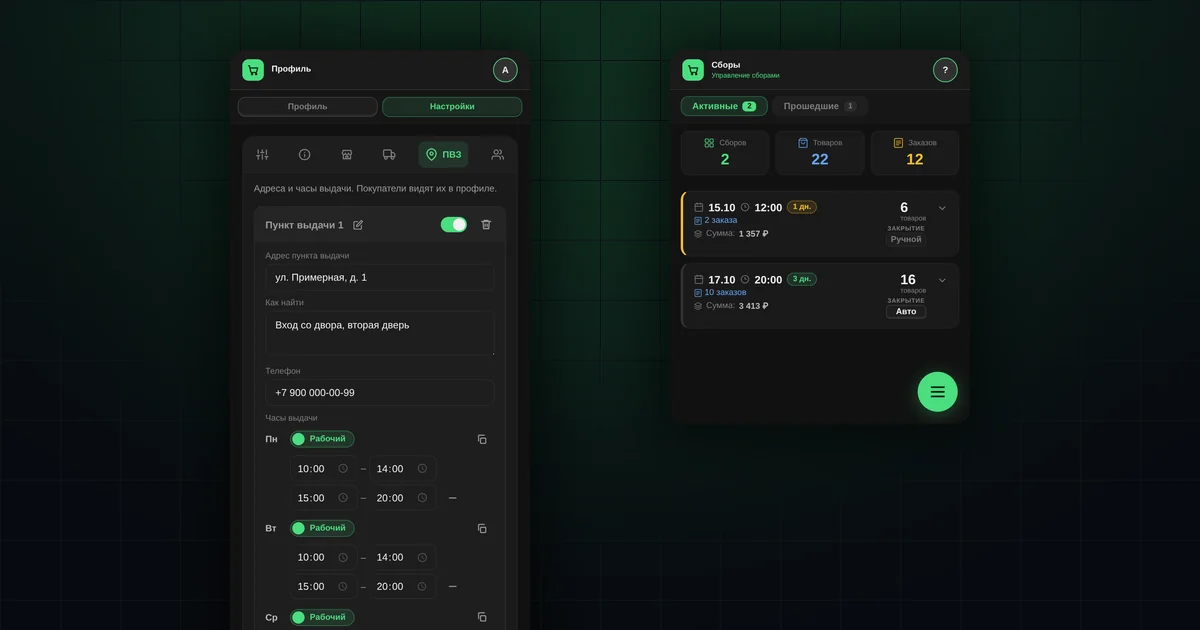
All settings are in "Profile" → "Settings".
- "About". The line under the name (up to 40 characters) and the shop description (up to 200 characters). Buyers see them on the sign-in page. The "Preview" button shows how it will look.
- Contact channels — required. The same tab has a "Contact channels for clients" block. Add links to your groups and chats in MAX, VK, Odnoklassniki, WhatsApp or Telegram and turn on "Show in profile". Buyers see them in their profile and can message you without searching for contacts.
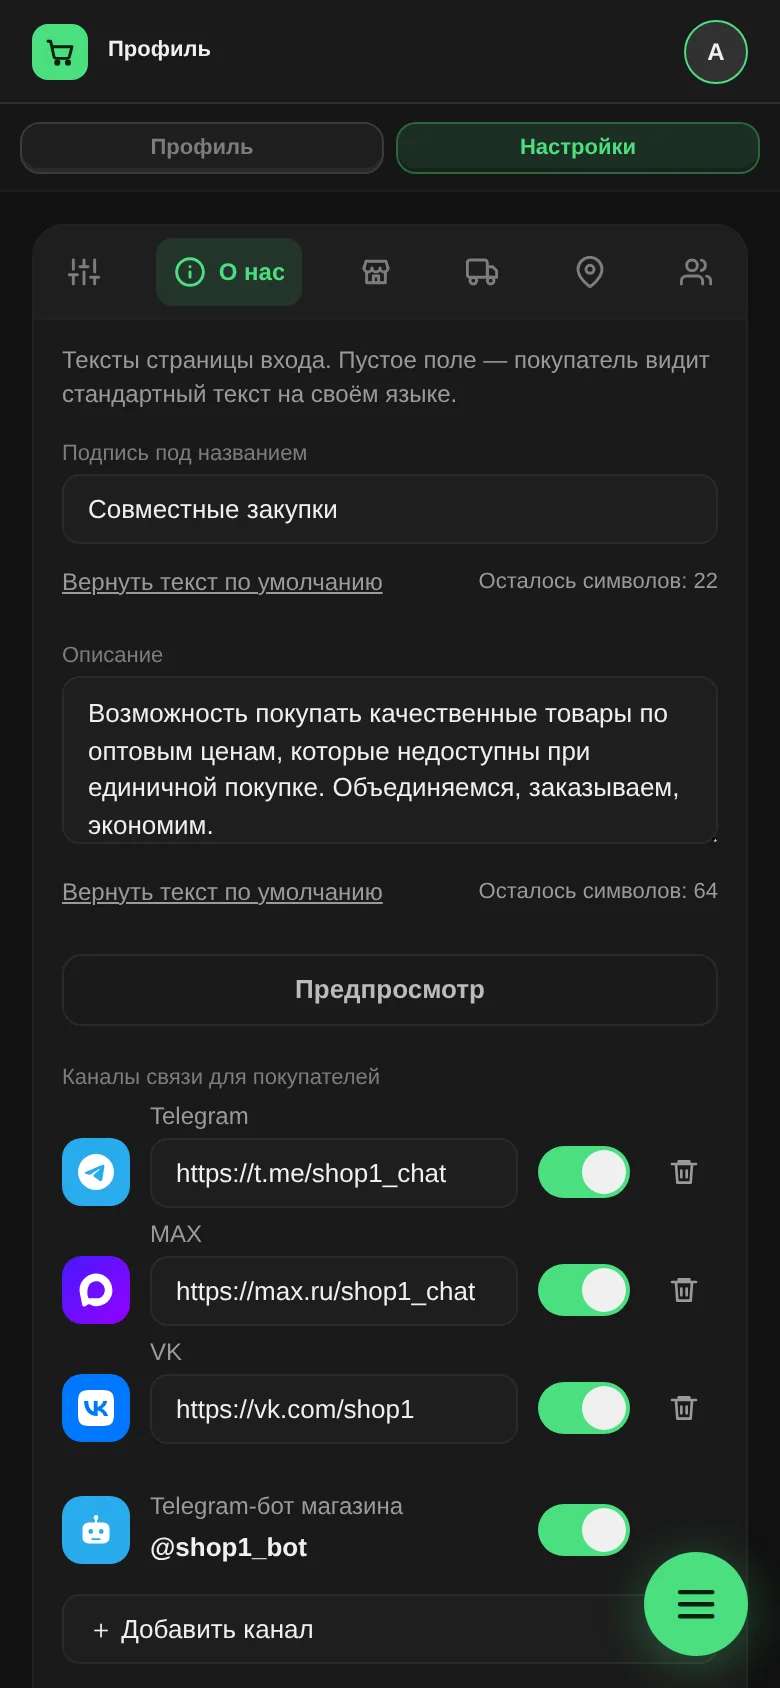
The "Contact channels for clients" block - "Pickup points". Pickup point address, a "How to find" hint, phone and pickup hours by day. If there is a break, add a second interval. Buyers see whether the point is open right now and can open it on the map. More: "Pickup points".
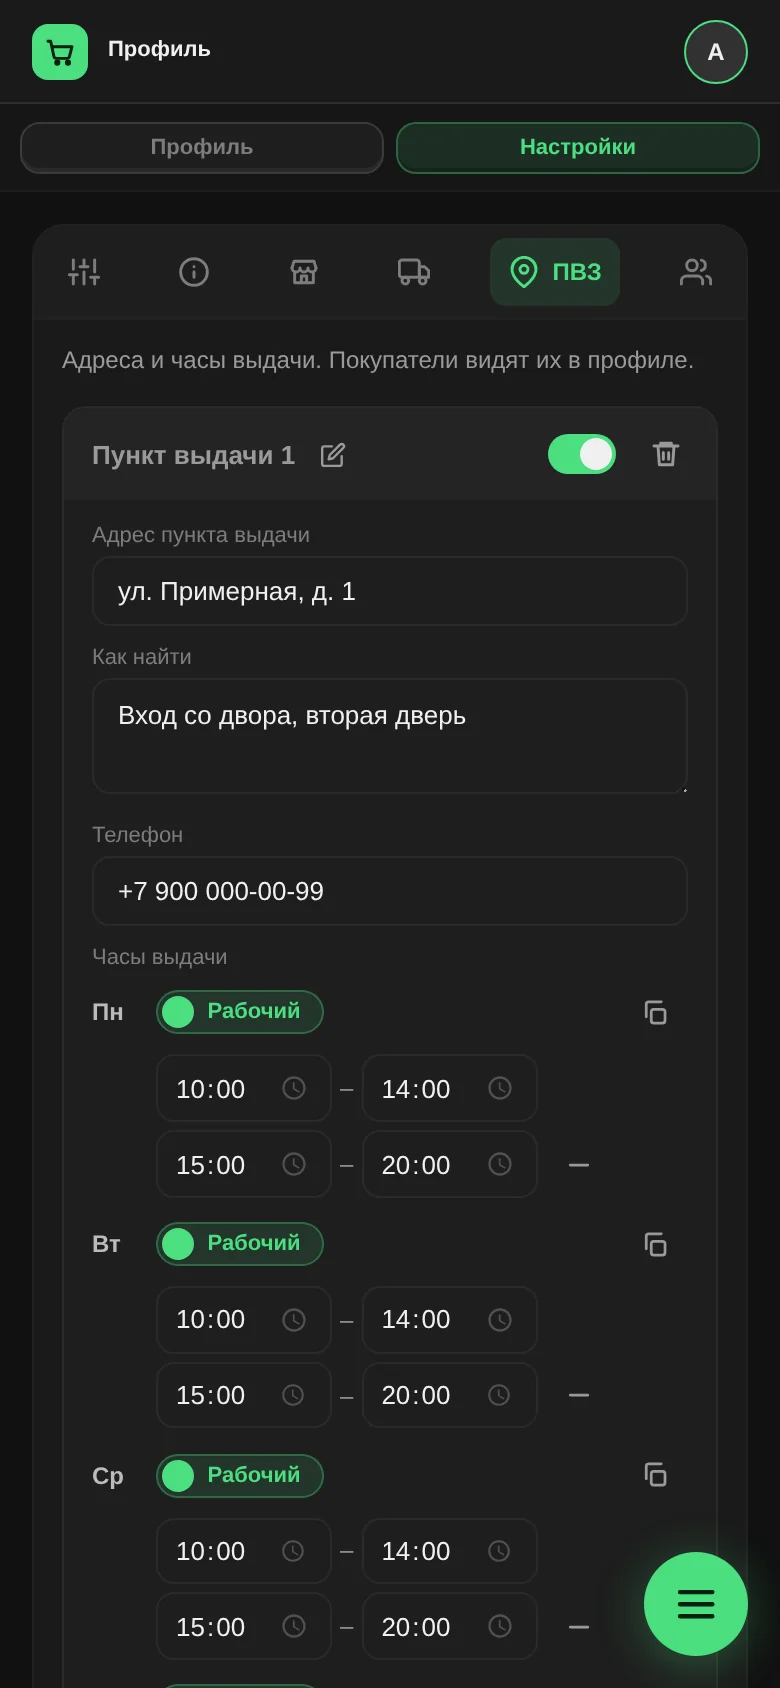
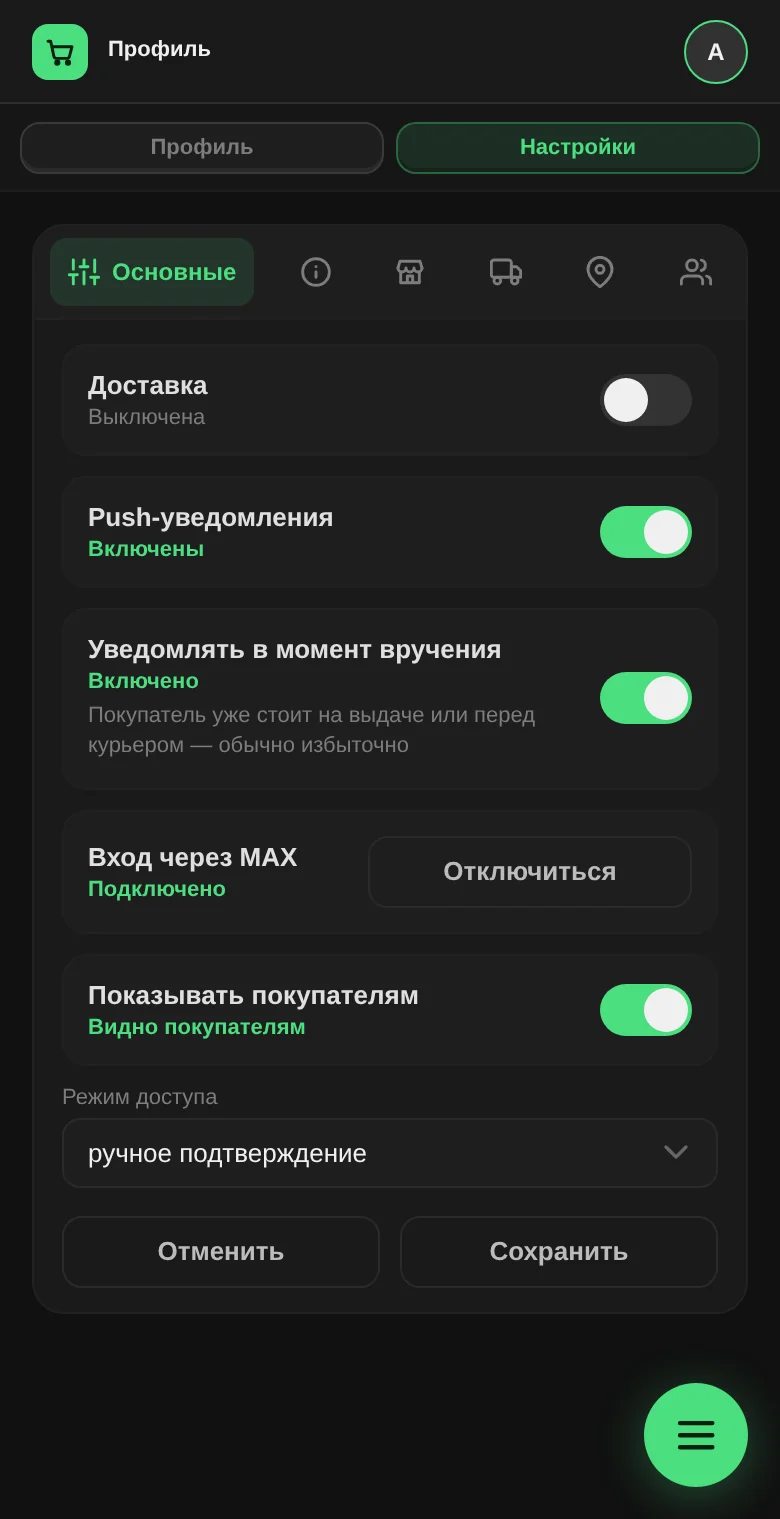
Pickup point settings with hours by day - "General". Turn on "Push notifications" so buyers get order notifications. If you deliver orders, turn on "Delivery" and fill in the terms on the "Delivery" tab.
- Your own notifications. In "Profile", turn on "Notifications" for yourself as well. You'll learn about new sign-up requests and buyer visits right away.
More on all settings and on contact channels.
Day 2. How do you add products?
There are two ways, and you can combine them.
- With an Excel file. "Products" → "Matrix" → download the "Blank template for new products", fill it in and upload it back. The file is checked before upload, and errors are shown row by row. More: "Catalog in Excel" and "Excel catalog export".
- One by one. "Products" → "Matrix" → "Add product". A new product is created hidden: buyers see it only after you publish it. You can add up to 4 photos to a product.
If you sell from stock and not only to order, fill in "Stock". More: "Preorder or from stock".
If your shop is connected to a supplier's range, the supplier's new products arrive in the "Suppliers" section. You can edit them, set your own prices and save them to your catalog without typing them in.
Day 3. How do you invite buyers?
- Choose an access mode. "Settings" → "General" → "Access mode". Details in the next section.
- Send the link to the app to your group. Along with it, send the buyer guide and the sign-up guide from the starter kit.
- Issue PINs to those who submitted a request. "Members" → "Requests": copy the PIN, send it to the buyer in any convenient way and tap "Mark SMS sent". The buyer signs in with their phone number and the PIN.
How do you keep strangers out of your shop?
Choose manual approval in "Access mode". Then:
- a new person can only submit a request, and gets in only after you issue them a PIN;
- self sign-up by call and via MAX is closed to new people;
- people you have already approved keep signing in as usual, including by call and via MAX.
With automatic approval, buyers sign up on their own by call or via MAX, if those methods are connected. This suits open groups where you don't check everyone.
Day 4. How do you open the first collection?
- Select products, set the collection end date and time and the "Published" status. On a computer, this is done in the "Matrix"; on a phone, with the "Open collections" button.
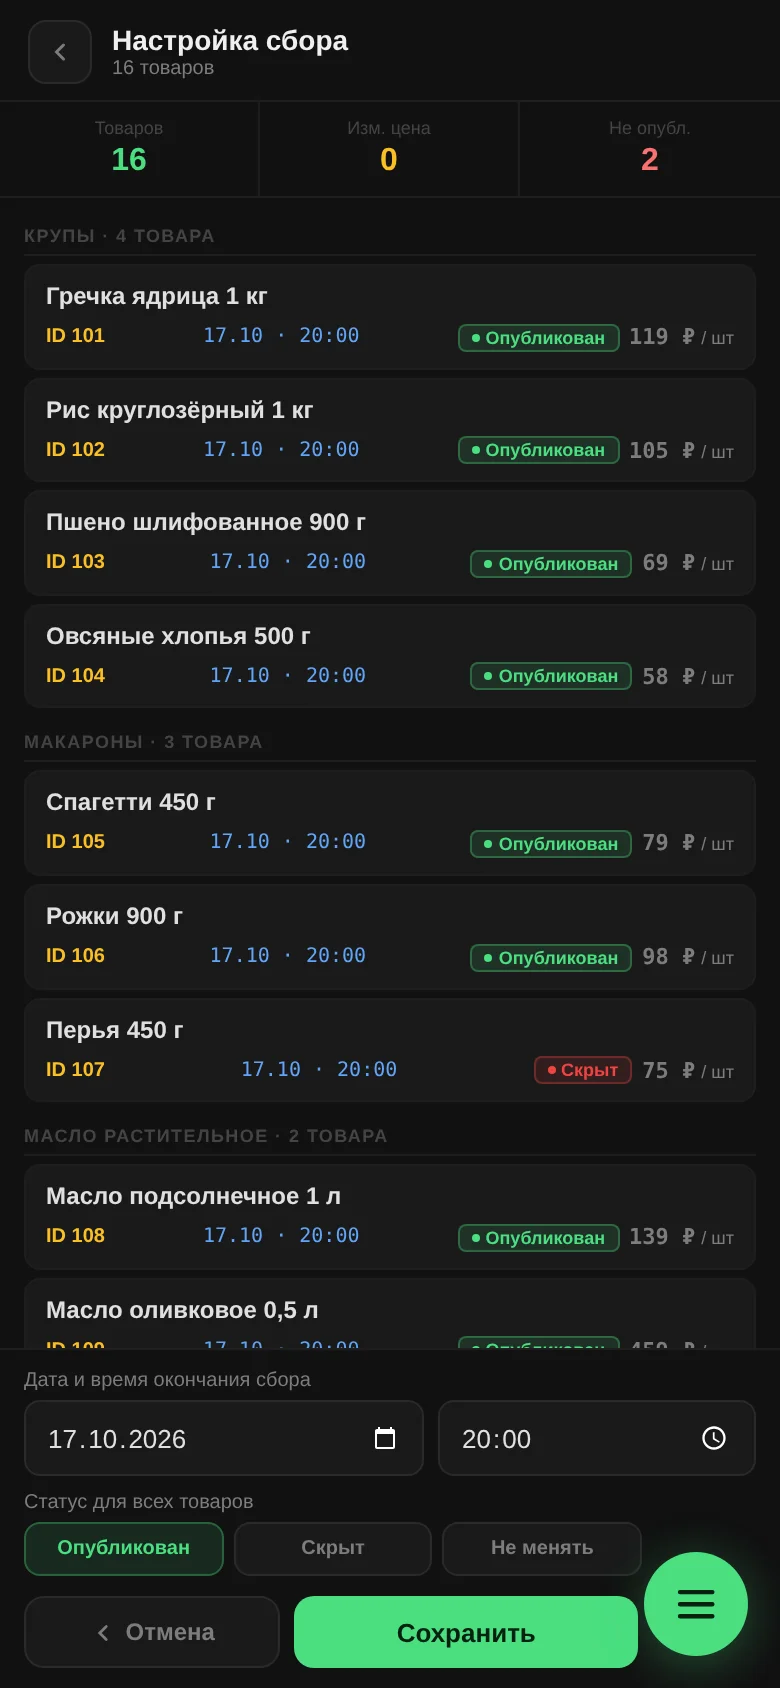
"Open collections" on a phone: the collection setup screen - Check the collection in "Collections" → "Active". Choose how it will close: "Auto" closes it exactly at the set time, "Manual" closes it when you do.
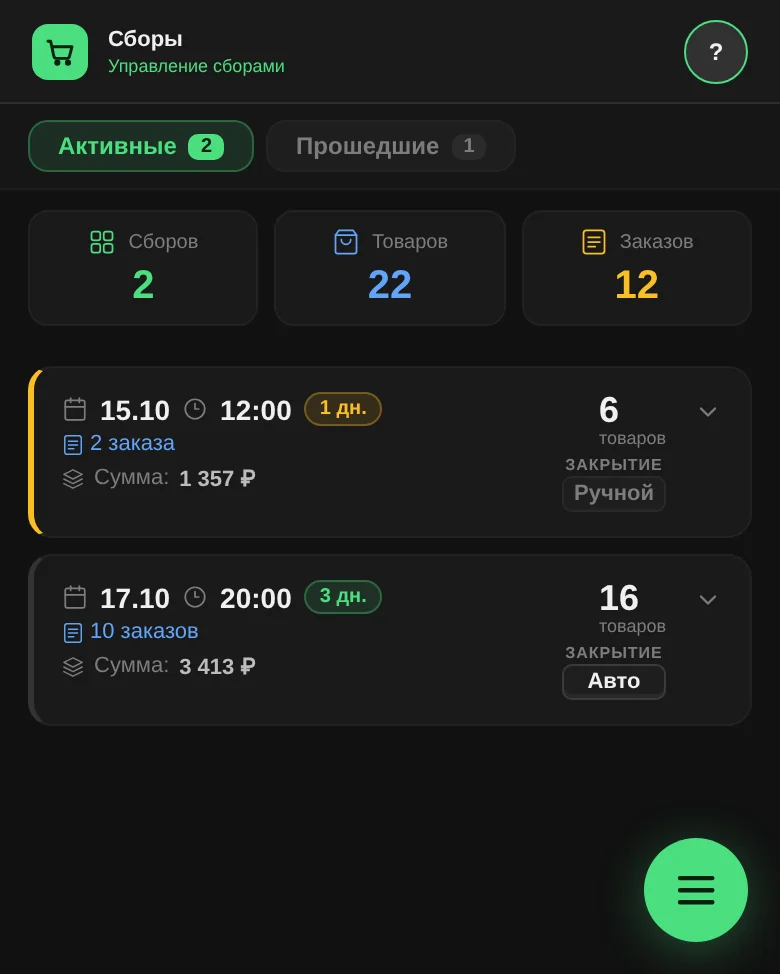
"Collections" → "Active": "Auto" or "Manual" closing - Tell your buyers. The "Copy" button in the collection card gives you a ready list with product links that you can paste into any group. If the shop bot has been added to your Telegram group, the same list is sent with the "Broadcast" button.
More: "Opening a collection".
Day 5. What happens when a collection closes?
"Close collection", or an automatic close, does several things at once:
- the collection's products are hidden;
- orders move to "Purchasing";
- buyers get a notification.
The order is not sent to the supplier automatically. You decide what to buy: for example, if a box was not fully filled, you can cancel some orders and resell the rest of the box to other buyers. More: "Closing a collection".
Day 6. How do you hand out the first orders?
- When the goods arrive, open "Orders" → "Report" → "Purchasing" and move the items to "Ready for pickup". Buyers get a notification.
- A buyer can let you know they are coming with the "Pick up order" button. The visit appears in "Orders" → "Issue".
- In the pickup window, select what you are handing out. Unselected items stay "Ready for pickup". The pickup document is generated there too.
- While the buyer is there, go through the checklist with them.
Day 7. What to look at in Statistics?
The "Statistics" section shows:
- how much has been handed out and for what amount;
- who has orders that have been waiting for pickup for a long time;
- which subcategories sell best.
After the first collection there is little data, but a weekly look here is a useful habit. More: "Statistics and analytics".
Questions and answers
Do you have to do it all in 7 days?
No. The days are an order, not a deadline. The main thing is to fill in settings and contact channels before buyers arrive.
Can you place an order yourself to see what buyers see?
Yes. "Profile" has an "Admin / Client" switch.
What if a buyer can't sign in?
Check in "Members" whether they were issued a PIN and whether it was used. If the PIN wasn't used, the person needs help signing in. More: the pickup checklist.